Transfer Photos from iPhone to Windows 11: The Simplest Method According to Your Needs
Importing iPhone photos to Windows 11 seems like a simple task: you plug in, click, and the images appear. However, in real life, the iPhone does not always show up, some photos remain on iCloud, HEIC files can be surprising, and the import can drag on if the photo library is heavily loaded. The right method is therefore not necessarily the same for retrieving 80 vacation photos, migrating an entire library, or regularly syncing your phone with your PC.
The fastest solution often remains the USB cable with the Windows 11 Photos app, provided the iPhone is unlocked and the connection authorization is granted. For regular use, iCloud for Windows or a cloud service becomes more convenient. The real issue, fundamentally, is not just copying files: it’s doing it properly, without quality loss, without duplicates, and without having to try three useless attempts.
In Brief
⚡ For a one-time transfer, the simplest is to use a data-compatible USB cable and the Windows 11 Photos app.
☁️ For regular synchronization, iCloud for Windows avoids repeating the same imports, especially if some photos are stored only in iCloud.
🗂️ To keep control, the File Explorer allows you to manually copy images from This PC > Apple iPhone > Internal Storage > DCIM.
🧩 If it gets stuck, first check three points: iPhone unlocked, “Trust this computer” message accepted, cable capable of transferring files.
Why does the transfer seem simple but often gets stuck?
The transfer mainly gets stuck when Windows 11 cannot properly access the iPhone: phone locked, authorization not granted, cable limited to charging, or photos stored only on iCloud. Before changing the method, these prerequisites must be checked, as they explain a large part of import failures.
The iPhone and Windows 11 know very well how to exchange photos, but they do not think exactly the same way. On Apple’s side, images can be local, optimized on the device, or synchronized with iCloud. On Windows’ side, the computer expects to see an accessible device, readable folders, and available files. When one of these links fails, the user feels that “nothing works,” whereas the problem often comes from an authorization or storage step.
According to the Microsoft guide on importing photos to a PC, the phone must be on and unlocked for the computer to import content. Apple also reminds, in its help article on transferring photos from an iPhone or iPad, that access to photos can go through iCloud when they are not locally present on the device.
In practice, there are mainly three scenarios: the user wants to transfer a few images quickly, wants to clear a large photo library, or is looking for an automatic solution to not think about it anymore. And here, no joke, the “best method” changes completely.
In the field, it is observed that many blockages come from a very trivial detail: the iPhone locks again while the user is looking at the PC screen. As a result, Windows 11 loses access or only displays part of the content. Keeping the iPhone unlocked during the import already avoids many false problems.
- Small batch of photos: favor the Windows 11 Photos app, simple and visual.
- Large photo library: prepare disk space, proceed in batches, and avoid interruptions.
- Photos already in iCloud: use iCloud for Windows rather than just a cable.
- Need for precise organization: use File Explorer and organize folders manually.
How to import iPhone photos to Windows 11 using a USB cable?
To import photos from an iPhone to Windows 11 via cable, connect the iPhone with a USB cable capable of transferring data, unlock it, confirm “Trust this computer,” then open the Photos app. Click Import, choose the connected iPhone, select the images and the save location.
The cable method remains the most direct way to transfer iPhone photos to a PC. It does not require a cloud account, does not depend on background synchronization, and allows you to quickly retrieve a specific album. It is often the right choice after a trip, a family event, or a PC change, provided you use a cable that actually transfers data, not just electricity.
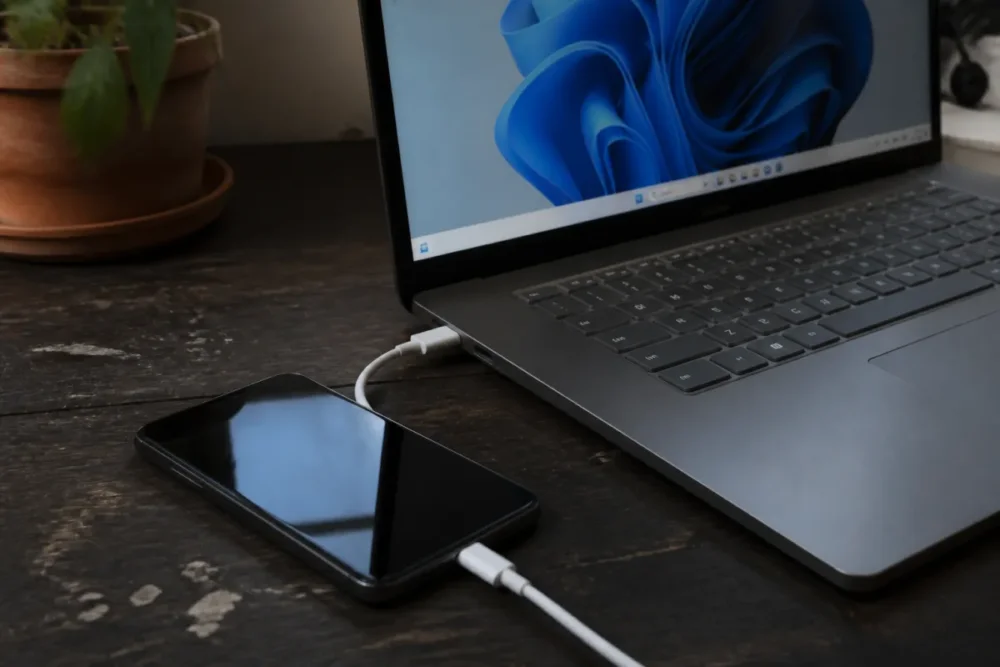
For iPhone 14 and earlier, a Lightning to USB cable is generally used. For iPhone 15 and later, the connector switches to USB-C. In both cases, the important thing is the same: the cable must allow file transfer. A low-end cable or one provided with a charging accessory may sometimes be enough to charge the iPhone, but not to make it properly visible in Windows.
Prepare the iPhone before import
Before launching the Windows Photos app, take thirty seconds to prepare the iPhone. It’s less spectacular than a twelve-step tutorial, but it often makes the difference. The iPhone must remain on, unlocked, and the trust authorization must be accepted if it appears on the screen.
- Connect the iPhone to the PC with a USB cable compatible with data transfer.
- Unlock the iPhone with Face ID, Touch ID, or the passcode.
- If the message appears, tap “Trust this computer”.
- Keep the iPhone connected and avoid locking it during the import.
- Open the Photos app from the Start menu if it does not launch automatically.
Start the import in the Photos app
In the Windows 11 Photos app, the idea is simple: you choose the Import option, then the connected device. Windows then scans the accessible contents on the iPhone and offers to select the photos or videos to bring over. You can import the entire batch or only some items, which avoids cluttering the PC with images already saved elsewhere.
It is always advisable to check the save location before clicking too quickly. A “Pictures” folder filled without organization quickly becomes a tangled mess. For a vacation album, for example, a folder like Pictures > 2025-08-Brittany or iPhone Photos > Birthday will be much more useful in six months.
A good transfer is not measured only by the number of files copied, but by how easily they can be found afterwards.
The limits of the USB cable
The USB cable is fast and reassuring, but it’s not magical. With a large photo library, importing can become slow, especially if many videos are present. Duplicates can also appear if you restart multiple imports without sorting. And if some images are only stored in iCloud, Windows may not necessarily be able to retrieve them directly from the iPhone using this method.
In other words, the cable is excellent for a one-time transfer or a well-identified batch. For a photo library that continuously lives between the iPhone, the PC, and the cloud, it becomes less comfortable. This is where alternatives make all the sense.
Which alternatives are more practical on a daily basis?
If you often import photos, cloud solutions become more interesting than manual connection. iCloud for Windows suits users already engaged in the Apple ecosystem, while OneDrive or another cloud service can centralize files on the Microsoft side. File Explorer remains the most manual and controllable option.
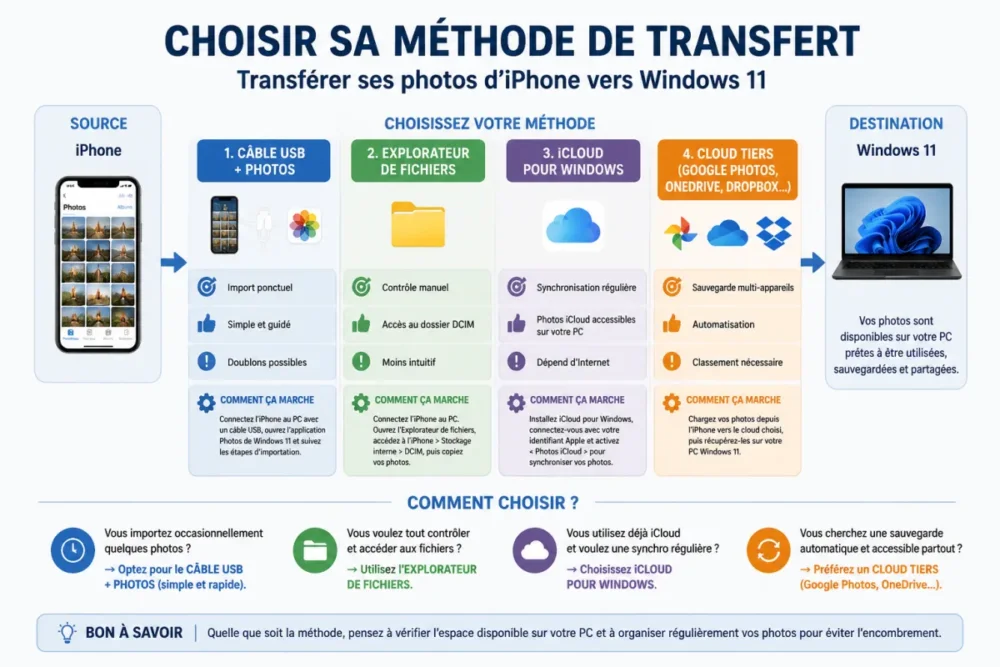
To summarize, there are three main categories: local import via cable, iCloud synchronization, and backup via a third-party cloud service. They can even complement each other. For example, you can use iCloud to view your photos daily, then perform a large local export to a hard drive when you want to archive an entire year.
iCloud for Windows: comfortable if your photos are already in iCloud
If iCloud Photos is enabled on the iPhone, some images may not be directly available for transfer via cable because they are stored in iCloud rather than in full quality on the device. In this case, iCloud for Windows becomes more logical: it allows access to photos from the PC without relying solely on the iPhone’s local storage.
This method is particularly interesting for regular use. You avoid connecting the phone every time, you find your images on multiple devices, and you reduce forgetfulness. However, it depends on the Internet connection, available cloud space, and how you choose to manage your photo library within the Apple ecosystem.
File Explorer: less pretty, but very effective
Windows File Explorer allows manual access to the iPhone via This PC > Apple iPhone > Internal Storage > DCIM. This method is less guided than the Photos app, but it appeals to those who want to copy folders themselves, check what they move, and organize files their own way.
Be careful though: the DCIM structure can seem obscure, with several folders that don’t always have clear names. This is not a bug; it’s an internal organization. To avoid chaos, it’s better to copy the files into a temporary folder, then sort them afterward by period, event, or content type.
OneDrive or another cloud: practical, but needs framing
OneDrive iPhone, Google Photos, or other cloud services can automate sending images to an online space accessible from Windows 11. It’s comfortable for centralizing, sharing, and finding your photos from multiple devices. The icing on the cake is that it limits the risk of forgetting everything on a single phone.
But automation does not exempt you from tidying up. Without simple rules, you replace a transfer problem with a digital mess problem. It’s better to decide from the start whether the cloud serves as a backup, main library, or just a gateway to the PC.
| Method | Ideal for | Strength | Main limitation |
|---|---|---|---|
| Windows 11 Photos App | One-time import | Simple and guided | Can create duplicates if repeated without sorting |
| File Explorer | Manual organization | Direct control of files | DCIM folders sometimes hard to read |
| iCloud for Windows | Regular synchronization | Access to photos stored in iCloud | Depends on Internet and cloud storage |
| OneDrive or other cloud | Multi-device backup | Automation and sharing | Requires good organizational discipline |
How to choose the best method according to your situation?
Choose the USB cable with Photos for a quick and one-time transfer, File Explorer to control your folders, and iCloud for Windows if your photos are already synced with iCloud. For a large photo library, favor a progressive method, with disk space verification and backup before deletion.
The classic trap is to look for “the” universal method. In reality, importing iPhone photos to Windows 11 depends on your immediate need: retrieving a few shots, migrating a complete photo library, emptying the phone, or setting up a backup routine. That’s why a method considered perfect by one user can become tedious for another.
For a one-time transfer, the Windows 11 Photos app checks almost all the boxes. It is already integrated into the system, guides the user, and allows selecting the items to import. For a large migration, File Explorer can reassure, because you better see what you are copying. For regular use, iCloud for Windows or a cloud service takes the advantage, as the effort almost disappears in daily life.
- You just returned from a trip: connect the iPhone, import the album, organize it immediately.
- You are changing computers: prepare a dedicated folder, import in batches, and verify files before deletion.
- You lack space on the iPhone: back up locally then check that the photos open correctly.
- You want to find everything everywhere: favor iCloud for Windows or a properly configured cloud.
The best method is the one that reduces handling without making you lose control of your originals.
Why doesn’t the iPhone appear in Windows 11?
When the iPhone doesn’t appear in Windows 11, start with simple causes: cable, USB port, iPhone lock, and trust authorization. If the device remains invisible, try another port, manually launch Photos from the Start menu, then restart the PC and iPhone before looking for a more complex solution.
In practice, this problem is more common than you might think. The cable may charge without transmitting data, the iPhone may be waiting for a validation the user hasn’t seen, or Windows may simply not open the Photos app automatically. Before concluding incompatibility, you need to go through a mini-checklist.
Quick checklist when Windows sees nothing
- Unplug then replug the USB cable.
- Unlock the iPhone and see if an authorization request appears.
- Tap “Trust this computer” if the message appears.
- Try another USB port on the PC.
- Manually open the Photos app from Windows search.
- Test another cable if doubt persists.
Good to know: a certified MFi cable is generally recommended for iPhones with Lightning connector, especially on iPhone 14 and earlier models. On iPhone 15 and later, USB-C simplifies connectivity but does not exempt you from verifying that the cable is indeed for data transfer.
How to manage HEIC photos and incomplete imports?
iPhone HEIC photos can surprise Windows users because they do not always behave like classic JPEGs depending on the installed applications. If an imported image does not open correctly, the problem does not necessarily come from the transfer: it may come from the format, the player used, or the iPhone settings.
The HEIC format is appreciated on the iPhone side because it allows maintaining good quality with files generally more efficient than JPEG. But on Windows, depending on the configuration, it may require appropriate support. If you want to avoid surprises during future transfers, you can also check the camera format settings on the iPhone and choose a more compatible mode when it is relevant for your use.
Incomplete imports often come from a batch that is too large, an iPhone locked too early, an unstable cable, or photos that are not actually stored on the iPhone. If iCloud is enabled and the originals are in the cloud, you need to use iCloud for Windows or ensure that the files are available locally before restarting the import.
Good practices to avoid unpleasant surprises
- Import in batches if the photo library is large.
- Keep the iPhone connected and unlocked until the end.
- Check the available space on the PC before starting a large transfer.
- Open some photos and videos after import to confirm they are readable.
- Do not delete anything from the iPhone until the backup is verified.
Organizing your photos well after transfer
Once photos are recovered on the computer, the real comfort comes from sorting. Without organization, transferring your photos from iPhone to Windows 11 is like moving disorder from one device to another. A few clear folders, a simple naming rule, and duplicate checking save a lot of time.
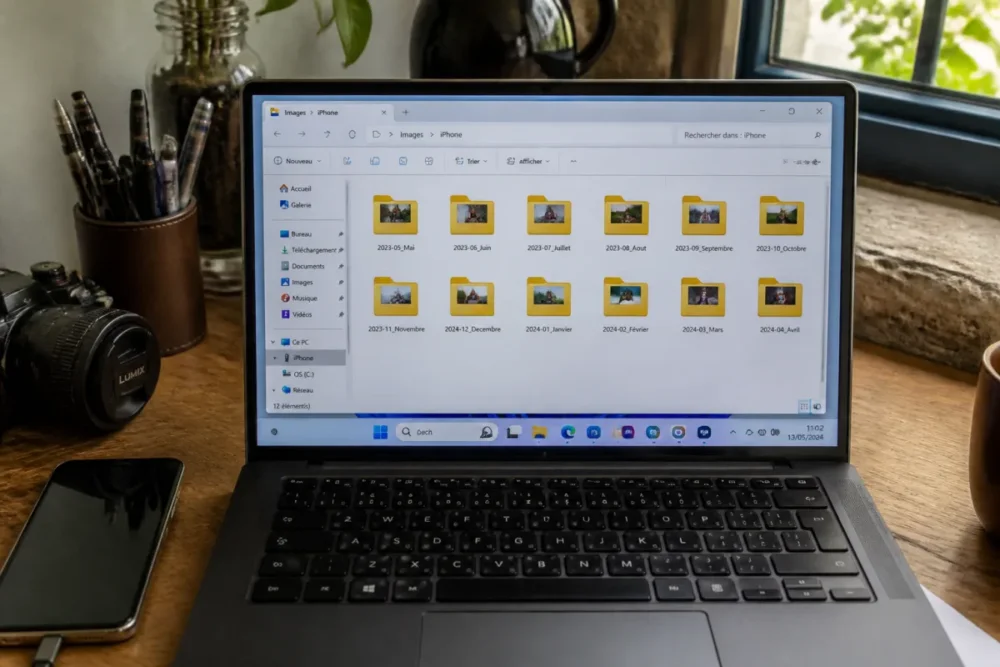
The simplest method is to create folders by year, then by event. For example: Photos > 2025 > 2025-07-Vacations. It’s not very glamorous, but it’s incredibly effective. For families, trips, or professional content, this logic avoids mixing screenshots, important photos, and heavy videos in one endless folder.
After import, also take the time to check for duplicates. They easily appear when you successively use the Photos app, File Explorer, and a cloud service. In other words, the more methods you multiply, the more you need to be attentive to organization.
A family changing PCs reported importing the same album three times, first via Photos, then via DCIM, then through the cloud. The problem was not the transfer, but the absence of a clear destination folder from the start. A single temporary folder would have avoided confusion.
Conclusion: the simplest method depends on your needs
To go fast, the USB cable and the Windows 11 Photos app remain the best starting point. To keep control over files, File Explorer is less elegant but often very effective. To access your images everywhere without regular connection, iCloud for Windows or another cloud becomes more comfortable.
The right strategy is therefore to choose according to your photo volume, your need for automation, and your tolerance for manual organization. The cherry on top: whatever the method, keep a verified backup before deleting anything from the iPhone. It’s less exciting than the transfer itself, but it’s what truly protects your memories.
Key takeaways
- ⚡ The USB cable remains the fastest for a one-time import to Windows 11.
- 🔐 The iPhone must be unlocked and authorized via “Trust this computer.”
- ☁️ iCloud for Windows is preferable if your originals are stored in iCloud.
- 🗂️ File Explorer offers more control but requires more organization.
- 🧪 Always check some imported files before deleting the originals.
FAQ
Is it necessary to install iTunes to import iPhone photos on Windows 11?
No, for a basic photo transfer, iTunes is not required on Windows 11. The Photos app and File Explorer are usually sufficient, provided the iPhone is unlocked and the trust authorization is confirmed.
Why is the iPhone DCIM folder empty on my PC?
The DCIM folder may appear empty if the iPhone is locked, if the authorization has not been accepted, or if the photos are only stored in iCloud. Try unlocking the iPhone, reconnecting the cable, and if necessary, using iCloud for Windows.
How to avoid duplicates after multiple imports?
The simplest way is to create a different destination folder for each import, with a date or event in the name. Avoid mixing the Photos app, DCIM, and cloud without checking what has already been copied.
Are iPhone videos transferred like photos?
Yes, they can be imported using the same methods, but they are often larger and slow down the transfer more. For a large batch of videos, it’s better to import in small groups and check the available space on the PC.
Which method should I choose if I change Windows PC?
For a PC change, favor a controllable method: import via cable or File Explorer, then back up to an external drive or cloud. Then verify that the photos open correctly before deleting the files from the old device or the iPhone.