.en-bref { max-width: auto; margin: 2em auto; padding: 1.5em 1.8em; color: #78350f; font-family: “Inter”, “Segoe UI”, sans-serif; text-align: left; position: relative; box-sizing: border-box; background: #fff2d7; border: 0; border-left: 0px solid #b45309; border-radius: 0; box-shadow: none; }
.en-bref h2, .en-bref .en-bref-header { font-size: 1.15em; font-weight: 700; margin-bottom: 0.6em; color: #b45309; }
.en-bref p, .en-bref li { font-size: 1em; line-height: 1.65; margin: 10px; }
.en-bref strong { color: #451a03; }
.mg-callout{margin:1.5em 0;padding:.9em 1.1em;border:1px solid;border-left-width:4px;border-radius:10px;font-size:.97em;line-height:1.65}.mg-callout>:first-child{margin-top:0}.mg-callout>:last-child{margin-bottom:0}.mg-callout__label{display:block;margin:0 0 .35em;font-weight:700;font-size:.82em;letter-spacing:.03em;text-transform:uppercase}.mg-callout__label::before{margin-right:.45em;font-size:1.05em;vertical-align:-.06em}.mg-callout–info{background:#eff6ff;border-color:#bfdbfe;color:#1e3a5f}.mg-callout–info .mg-callout__label{color:#2563eb}.mg-callout–info .mg-callout__label::before{content:”\2139\FE0F”}.mg-callout–tip{background:#f0fdf4;border-color:#bbf7d0;color:#14532d}.mg-callout–tip .mg-callout__label{color:#15803d}.mg-callout–tip .mg-callout__label::before{content:”\1F4A1″}.mg-callout–warning{background:#fffbeb;border-color:#fde68a;color:#7a4a10}.mg-callout–warning .mg-callout__label{color:#b45309}.mg-callout–warning .mg-callout__label::before{content:”\26A0\FE0F”}.mg-callout–danger{background:#fef2f2;border-color:#fecaca;color:#7f1d1d}.mg-callout–danger .mg-callout__label{color:#dc2626}.mg-callout–danger .mg-callout__label::before{content:”\1F6D1″}.mg-proscons{display:grid;grid-template-columns:1fr 1fr;gap:16px;margin:1.5em 0}@media(max-width:560px){.mg-proscons{grid-template-columns:1fr}}.mg-proscons__col{padding:.9em 1.1em;border:1px solid;border-radius:10px}.mg-proscons__title{display:flex;align-items:center;gap:.4em;margin:0 0 .5em;font-weight:700;font-size:.9em;letter-spacing:.02em}.mg-proscons__col ul{margin:.3em 0 0;padding-left:1.15em}.mg-proscons__col li{margin:.3em 0;line-height:1.55}.mg-proscons__col–pro{background:#f0fdf4;border-color:#bbf7d0;color:#14532d}.mg-proscons__col–pro .mg-proscons__title{color:#15803d}.mg-proscons__col–pro .mg-proscons__title::before{content:”\2705″}.mg-proscons__col–con{background:#fef2f2;border-color:#fecaca;color:#7f1d1d}.mg-proscons__col–con .mg-proscons__title{color:#dc2626}.mg-proscons__col–con .mg-proscons__title::before{content:”\274C”}ol.mg-steps{list-style:none!important;counter-reset:mgstep;margin:1.6em 0;padding-left:0!important}ol.mg-steps>li.mg-steps__item{counter-increment:mgstep;list-style:none!important;padding-left:0!important;padding-bottom:1.4em}ol.mg-steps>li.mg-steps__item:last-child{padding-bottom:0}ol.mg-steps>li.mg-steps__item>:last-child{margin-bottom:0}ol.mg-steps>li.mg-steps__item>.mg-steps__title{margin:0 0 .25em;font-weight:600}ol.mg-steps>li.mg-steps__item>.mg-steps__title::before{content:counter(mgstep) “. “;opacity:.45;font-weight:500;font-variant-numeric:tabular-nums}ol.mg-steps>li.mg-steps__item:not(:has(.mg-steps__title))::before{content:counter(mgstep) “. “;opacity:.45;font-weight:500;font-variant-numeric:tabular-nums}.mg-kpis{display:grid;grid-template-columns:repeat(auto-fit,minmax(140px,1fr));gap:14px;margin:1.5em 0}.mg-kpi{padding:1em .9em;border:1px solid #e5e7eb;border-radius:12px;background:#f9fafb;text-align:center}.mg-kpi__value{display:block;font-size:1.7em;font-weight:800;line-height:1.15;color:#111827}.mg-kpi__label{display:block;margin-top:.35em;font-size:.85em;color:#6b7280;line-height:1.35}
.wp-block-image,.ai-image{margin-bottom:1.75em}.wp-block-image>figcaption,.ai-image>figcaption{margin-top:.5em}
.magic-lb-overlay{position:fixed;inset:0;background:rgba(15,23,42,.92);display:none;align-items:center;justify-content:center;z-index:99999;cursor:zoom-out;padding:20px}
.magic-lb-overlay.open{display:flex}
.magic-lb-overlay img{max-width:95vw;max-height:95vh;object-fit:contain;border-radius:8px;box-shadow:0 8px 32px rgba(0,0,0,.5)}
.magic-lb-close{position:absolute;top:16px;right:20px;color:#fff;background:rgba(0,0,0,.5);border:none;width:40px;height:40px;border-radius:50%;font-size:24px;cursor:pointer;display:flex;align-items:center;justify-content:center}
.magic-lb-close:hover{background:rgba(0,0,0,.8)}
.wp-block-image img{cursor:zoom-in;transition:transform .15s ease}
.wp-block-image img:hover{transform:scale(1.01)}
.magic-img-link{display:inline-block;text-decoration:none}
(function(){
var ov=document.getElementById(‘magic-lb’);if(!ov)return;
var img=ov.querySelector(‘img’),btn=ov.querySelector(‘.magic-lb-close’);
function open(src){img.src=src;ov.classList.add(‘open’);document.body.style.overflow=’hidden’}
function close(){ov.classList.remove(‘open’);img.src=”;document.body.style.overflow=”}
document.addEventListener(‘click’,function(e){
var a=e.target.closest(‘a.magic-img-link’);
if(a){e.preventDefault();open(a.getAttribute(‘href’));return}
var i=e.target.closest(‘.wp-block-image img’);
if(i&&!e.target.closest(‘a’)){e.preventDefault();open(i.currentSrc||i.src)}
});
ov.addEventListener(‘click’,function(e){if(e.target===ov||e.target===btn)close()});
document.addEventListener(‘keydown’,function(e){if(e.key===’Escape’)close()});
})();
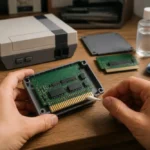
To clean the contacts of a retro cartridge that no longer starts, turn off and unplug the console, gently wipe the contacts with a cotton swab slightly moistened with isopropyl alcohol, then let it dry completely before testing. If the game remains unrecognized, check the cartridge on another compatible console and inspect the console’s connector.
A black screen, random startup, or unstable image can be caused by dust, deposits, or oxidation. Cleaning should be gradual: a light intervention is enough for dirty contacts, while extensive corrosion, a broken trace, or a worn backup battery requires a different diagnosis.
In brief
- 🧴 Use 90% or higher isopropyl alcohol and a lint-free applicator, with very little liquid.
- ⚠️ Work in a ventilated area, away from flames, sparks, or heat sources, and wait for complete evaporation before powering on again.
- 🛠️ Start without opening the cartridge. Disassembly is for directly inspecting the printed circuit if external cleaning fails.
- ⏳ Never test a cartridge while still wet and do not blow into its connector with your mouth.
- 🔎 If several games show the same fault, the problem likely comes from the console’s slot or connector.
Identifying if the cartridge is really at fault
A retro cartridge is a game medium with a printed circuit whose reading depends on the contact between its metal traces and the console’s connector. A fault limited to a single game points to the cartridge, but multiple faulty games require checking the console before repeating cleanings.
Symptoms indicating a bad contact
An intermittent black screen, a startup achieved after several insertions, or an unstable image correspond to a possible bad contact. Black deposits, visible dust, or tarnished contacts support this hypothesis, without proving by themselves that the cartridge is defective.
Missing save data does not necessarily mean the game is not read properly. A worn backup battery can prevent saving progress even if the game starts normally; cleaning the contacts does not fix this issue.
Cross-testing before any intervention
Turn off the console before each insertion and removal. Test a known working cartridge, then try the suspect cartridge on another compatible console when possible.
-
Test a reliable cartridge
A second game that starts on the same console reduces the likelihood of a connector failure.
-
Test the suspect cartridge
Use a compatible and powered-off console. Failure on two consoles points more towards the cartridge or its circuit.
-
Note the result
Avoid repeated random insertions. The result of each test helps distinguish a reading problem from a hardware defect.
Preparing the Right Equipment and Avoiding False Good Ideas
Cleaning the contacts of a retro cartridge requires few tools, but the choice of liquid and the amount applied matter more than the rubbing force. Prepare a dry surface, proper lighting, and a container to avoid losing screws if the case needs to be opened.
Useful Equipment for Controlled Cleaning
Plan to have 90% or higher isopropyl alcohol, a clean cotton swab or a lint-free foam applicator, a clean and dry cloth, as well as a soft brush to remove dust. The security screwdriver suitable for the model becomes necessary only for opening.
NES, SNES, and N64 cartridges may use screws requiring a 3.8 or 4.5 mm Gamebit bit depending on the model. Check the case before purchasing the tool: this indication does not replace the visual identification of the installed screw.
Products and Actions to Avoid
Exclude water, household products, solvents not intended for electronics, greasy aerosols, and abrasive products. Do not scrape the contacts with metal, do not sand their surface, and never immerse the cartridge.
Securing the Cartridge Before Touching the Contacts
A retro cartridge must be handled powered off, on a clean and dry surface. Unplug the console, remove the game without twisting it, and hold the printed circuit board by its edges if disassembly becomes necessary.
When to Clean Without Opening the Case
External cleaning is sufficient when dirt is light and the contacts are accessible through the case slot. Slightly moisten the applicator, then avoid any amount of liquid that could run inside.
Disassembly is not a mandatory step to maintain a dirty cartridge. Open only if the condition of the contacts cannot be properly inspected, if the first cleaning changes nothing, or if deposits seem present inside.
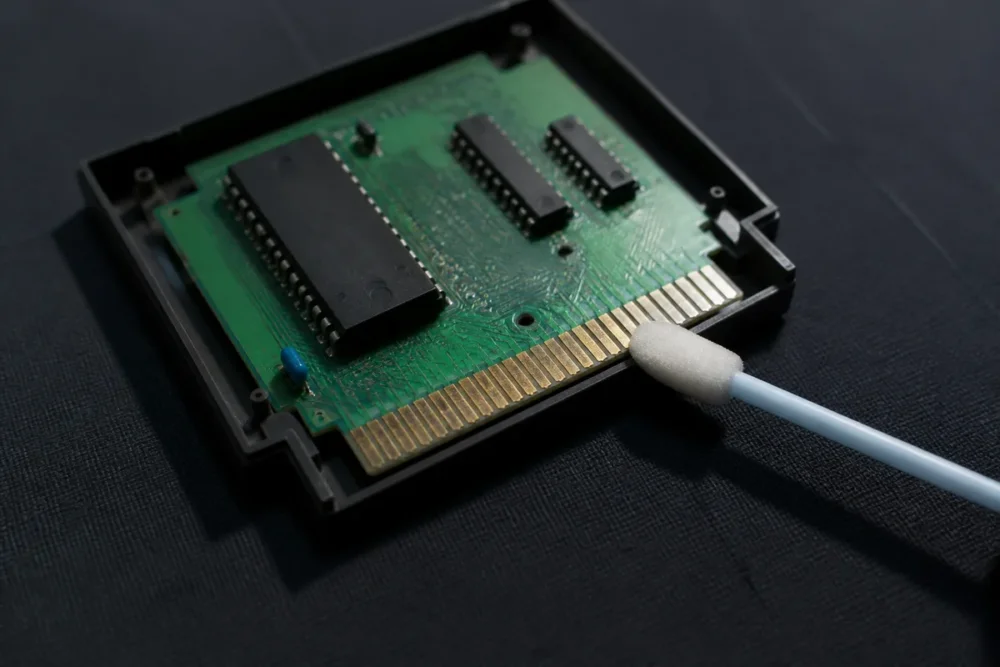
Opening the Case Without Creating a New Fault
Identify the type of screws before starting and never force a stubborn case. A photograph of the internal layout can help with reassembly, especially when a backup battery or several components are present.
Discharge static electricity before touching the printed circuit board and avoid any pressure on the components. A backup battery must remain in place during simple cleaning: its replacement is a separate intervention that can affect saved data.
Cleaning the Cartridge Contacts Step by Step
The safe method relies on a simple progression: inspection, minimal application of alcohol, gentle rubbing, residue removal, and complete drying. The goal is to remove deposits on the tracks, not to polish the contacts or alter their surface.
Start with a gentle cleaning, without disassembly.
Inspect the Contacts and Identify Anomalies
Observe the metal tracks under direct light. Dust, greasy marks, and black deposits call for routine cleaning; green discoloration, pitted surfaces, deep scratches, or a lifted track indicate a more serious problem.
Superficial dirt can be removed with a clean applicator. Extensive corrosion or a damaged contact should not be treated with repeated rubbing, as mechanical action may worsen the wear.
Apply Isopropyl Alcohol Sparingly
-
Moisten the Applicator
Place a small amount of isopropyl alcohol on the cotton swab or foam applicator. Never pour the product directly onto the printed circuit board.
-
Rub the Contacts
Move the applicator along the length of the tracks, applying light and steady pressure. Replace the applicator when it picks up visible residues.
-
Check the Surface
Ensure that deposits decrease without trying to artificially shine the metal. Stop if a track lifts or if an area appears deeply damaged.
Work in a ventilated area, away from flames, sparks, or heat sources, and wait for complete evaporation before powering on.
Remove Residues and Allow to Dry Completely
Finish with a clean, dry part of the applicator or a lint-free cloth. Let the alcohol evaporate in open air, without a hairdryer or strong heat source.
The cartridge must show no visible liquid traces, in a ventilated space, before reinsertion or powering on. Work in a ventilated area, away from flames, sparks, or heat sources, and wait for complete evaporation before powering on.
Reassemble, Test, and Interpret the Result
A reliable test is done after drying, on a powered-off console, with a single correct insertion. Observe the startup, image, sound, and game saving; several spaced startups help distinguish a stable improvement from a mere contact made by chance.
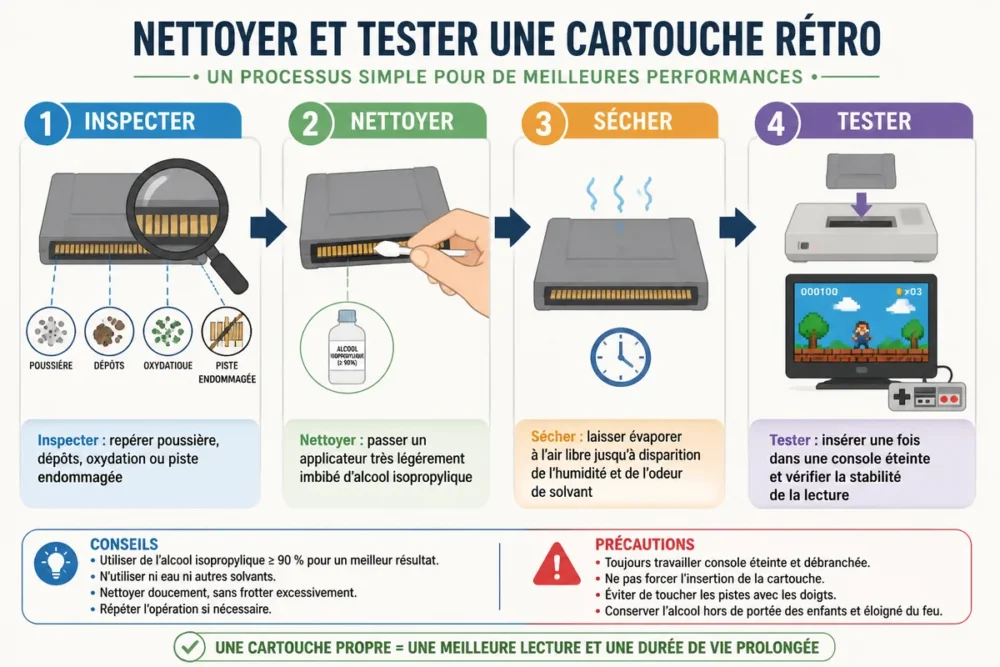
The testing protocol after cleaning
-
Reassemble without forcing
Replace the printed circuit board and the shell in their original position. Tighten the screws just enough to hold the case, without crushing the plastic.
-
Insert once
With the console off, insert the cartridge without lateral movement and without forcing. Then turn on the console and note the result.
-
Confirm the reading
Perform several spaced startups. Also check the save data, because a restored reading does not prove that the backup battery is working.
When to repeat cleaning
A cautious second pass may be justified if the applicator remains loaded with residue or if the contacts still show visible dirt. Use a clean applicator and stop after this second attempt if the appearance does not improve or if the fault remains the same.
Do not repeat rubbing indefinitely. The persistence of the defect after two controlled cleanings points to the connector, corrosion, or damage to the printed circuit board.
If the cartridge still does not start: guide the diagnosis
Cleaning without result does not automatically condemn the cartridge. Test several games, inspect the console slot, and look for visible damage before considering a repair; the correct component to address depends on the results of cross-testing.
Cartridge or console connector: do not clean the wrong element
| Test result | Cause to examine first | Cautious action |
|---|---|---|
| Only one cartridge fails | Contacts or circuit of this cartridge | Inspect then clean without abrasion |
| Several cartridges fail | Console slot or connector | Clean the connector with a method adapted to the model |
| The game starts but loses saves | Backup battery or associated circuit | Plan a specific backup diagnosis |
| The cartridge fails on two consoles | Possible internal hardware damage | Inspect the circuit or consult a repair technician |
On a NES, the 72-pin connector can be responsible for a reading fault even after cleaning the cartridge. The console slot can also accumulate dust; cleaning the connector requires a method adapted to the model and should not be improvised with metal or abrasive materials.
A cartridge that works on another console is not necessarily repaired: the first connector may be worn or dirty. In this case, do not clean the cartridge again; first check the console concerned.
Signs that justify specialized repair
Extensive corrosion, a cut or lifted trace, a movable component, a broken case, or visible soldering go beyond simple maintenance. A qualified repair technician can measure continuity and intervene without multiplying destructive rubbing.
A backup battery to replace deserves special attention when saves must be preserved. Replacement may require intervention on the circuit and should not be confused with cleaning the contacts.
Preventing the Return of Reading Problems
Storage directly affects the condition of the contacts and the casing. Store cartridges in a dry place, at a stable temperature, and protected from dust; a damp cellar, an attic subject to temperature fluctuations, or an area near a radiator are poor locations.
Handle each game by its case and avoid touching the metal tracks. Clean the shell with a suitable cloth, but protect the label from excessive rubbing: an old label can peel off or become marked more easily than bare plastic.
Repeated insertions and attempts with lateral movements increase the mechanical wear of the connector. Effective game cartridge maintenance therefore mainly relies on clean handling, closed storage, and intervention only when a symptom appears.
To complement the maintenance of the equipment, also consult our method for cleaning a yellowed retro console without damaging its plastic or inscriptions.
Your Questions About Cleaning a Retro Cartridge
Can a retro cartridge be cleaned with water?
No, water is not the preferred product for contacts and the printed circuit board. Use an applicator very lightly moistened with isopropyl alcohol suitable for electronics, then let it dry completely before any testing.
Which isopropyl alcohol should be used for a retro game cartridge?
A highly concentrated isopropyl alcohol is generally preferred to limit residues; check the recommendations of the product and cartridge manufacturers. The product should be applied in small amounts on the applicator, never poured directly onto the circuit. Work in a ventilated area, away from flames, sparks, or heat sources, and wait for complete evaporation before powering on again.
Is it necessary to open a cartridge to clean its contacts?
No, light cleaning can be done without disassembly when the contacts are accessible. Open the cartridge only for a thorough inspection or when external cleaning has not resolved the issue.
Why does my retro cartridge still show a black screen after cleaning?
The console connector, significant corrosion, a broken track, or a desoldered component could be the cause. Test another cartridge and, if possible, the cleaned cartridge on a second compatible console before concluding.
Can an eraser be used to clean the contacts of a cartridge?
An eraser is not a universal method and its mechanical action can wear down or contaminate the contact surface. Prefer isopropyl alcohol and a soft applicator first; reserve any abrasive restoration for a controlled case.
The Verdict
Light cleaning, complete drying, and cross-testing are sometimes enough to restore the reading of a retro cartridge. The absence of results after a clean intervention should suggest suspecting the console connector or a hardware failure rather than a need to rub more.