Best Brawl Ball Brawlers: Picks That Really Win and How to Choose Them According to the Map
The best Brawl Ball brawlers are not always those who show the most impressive damage on the end screen. In reality, this mode mainly rewards players who can gain ground, recover the ball at the right moment, and turn a small opening into a goal. That’s why the real question is not just “who hits the hardest?”, but rather which brawlers dominate Brawl Ball when the map, the opposing comp, and the pace of the game change.
The meta provides valuable clues, but it does not replace game reading. An excellent pick on a closed map can become average on an open map, and a very popular brawler can lose value if your team lacks control or mobility. The goal here: understand the profiles that really win, the lasting criteria behind a good Brawl Ball tier list, and the mistakes that turn a strong pick into a completely shaky choice.
In Brief
⚽ Brawl Ball rewards progression: a good brawler must create space, protect the ball carrier, and quickly convert an advantage into a goal.
📊 Data from Brawl Time Ninja place Damian at 75.0% adjusted win rate, ahead of Trunk and Gigi at 74.0%, over a very large volume of matches.
🧠 The most reliable criteria remain mobility, zone control, burst, survival under pressure, and the ability to open a line toward the goal.
🛡️ A good Brawl Ball comp generally combines a space creator, a finisher, and a profile capable of holding or restarting the midfield.
Which Brawlers Dominate Brawl Ball Today?
In Brawl Ball, the best brawlers are not just those who deal the most damage, but those who control space, open a passing lane, and quickly convert a favorable situation into a goal. The most solid picks combine mobility, constant pressure, and the ability to turn an exchange in a few seconds.
Statistical rankings provide a first answer. According to the Brawl Ball tier list from Brawl Time Ninja, Damian stands out as the brawler with the best adjusted win rate in Brawl Ball, at 75.0%. Trunk and Gigi follow at 74.0% each. This is not a small sample lying around somewhere: the page indicates relying on more than 16 million battles, with a stated margin of error of 0.21%.
Jokes aside, a raw statistic is not enough. A brawler can have an excellent win rate because it is played by more experienced profiles, because it shines on certain very popular maps, or because it fits well into dominant compositions. This is exactly where analysis becomes useful: the strongest brawlers in Brawl Ball are those whose qualities repeat in several situations, not those who only explode in an ideal scenario.
| Brawler Profile | What It Brings | When to Choose It | Main Risk |
|---|---|---|---|
| Controller | Locks corridors and slows restarts | Maps with contested zones, narrow midfield | Lack of finishing if the team doesn’t follow |
| Mobile | Regains tempo and punishes weak positioning | Open maps or dispersed opponents | Getting isolated without support |
| Tank | Forces entry and absorbs pressure | Closed maps, walls near the goal | Becoming predictable against control |
| Support | Stabilizes the team and speeds up sequences | Coordinated comps, long matches | Relying too heavily on allies |
Why Some Brawlers Dominate This Mode More Than Just High Damage
Brawl Ball is a territory mode disguised as a soccer match. Yes, you have to score, but before that, you need to advance, recover, survive, and then prevent the opponent from exiting cleanly. A brawler who wins a random duel but dies too far from the ball sometimes contributes almost nothing. Conversely, a brawler who forces two opponents to retreat opens a passing lane, even without causing a massacre.
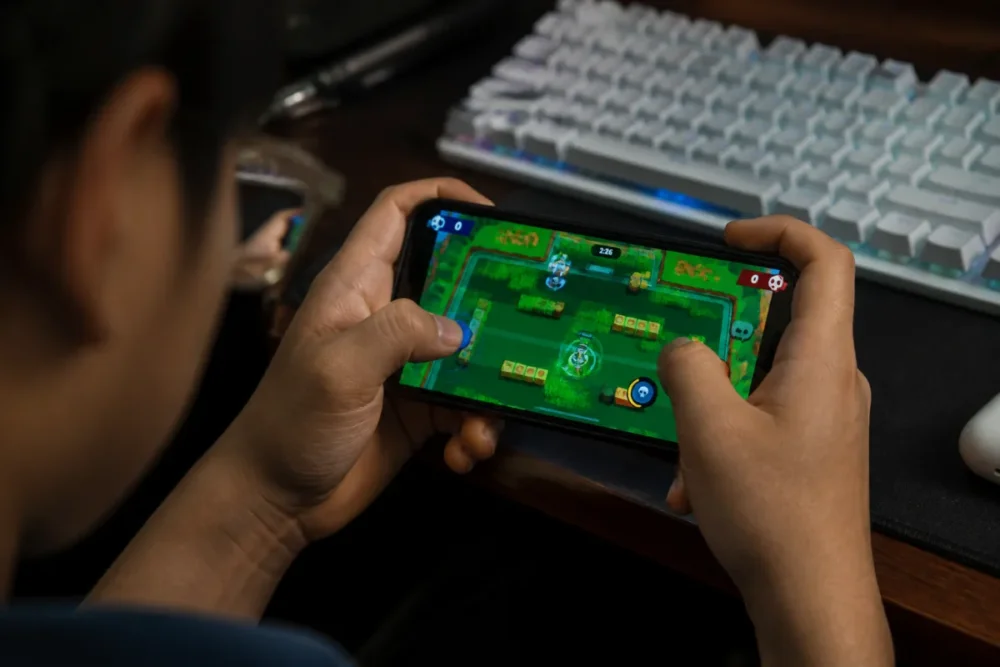
In practice, it is observed on the field that many defeats come from a bad tempo: three players engage in a duel, no one protects the ball, then the opposing team scores on a simple restart. The good brawler is therefore the one who gives structure to the action. They can hold the center, break a wall, accelerate a breakthrough, or stall until a teammate returns to defend.
A strong brawler in Brawl Ball doesn’t just win their duel: they make the opponent’s goal more accessible.
That’s why profiles like Jacky or Doug are regularly mentioned in general recommendations. The editorial guide from Google Play on the best brawlers by mode notably highlights Jacky for her ability to defend and accelerate, with a gadget increasing her speed by 25%, as well as Doug for his durability, quick healing, and dual offensive/defensive impact.
In ladder matches observed at intermediate level, a pattern often emerges: the team controlling the ball after the first exchange sets the pace for 20 to 30 seconds of perceived playtime, even without scoring immediately. The most effective players don’t always sprint towards the goal; sometimes they wait for an elimination or an opponent’s retreat before pushing forward.
What Criteria Really Make a Good Brawler in Brawl Ball?
A good brawler in Brawl Ball must control an area, survive under pressure, create or exploit an opening, and return to defend quickly after a failed action. Damage matters, but it becomes decisive only if it serves progress towards the goal or reliable ball recovery.
To choose wisely, you need to stop reading a Brawl Ball tier list as a truth falling from the sky. A good tier list gives a trend, but the match is won on concrete criteria. The most important ones repeatedly come up among experienced players: space control, mobility, burst, sustain, useful range, and the ability to break or bypass a defense.
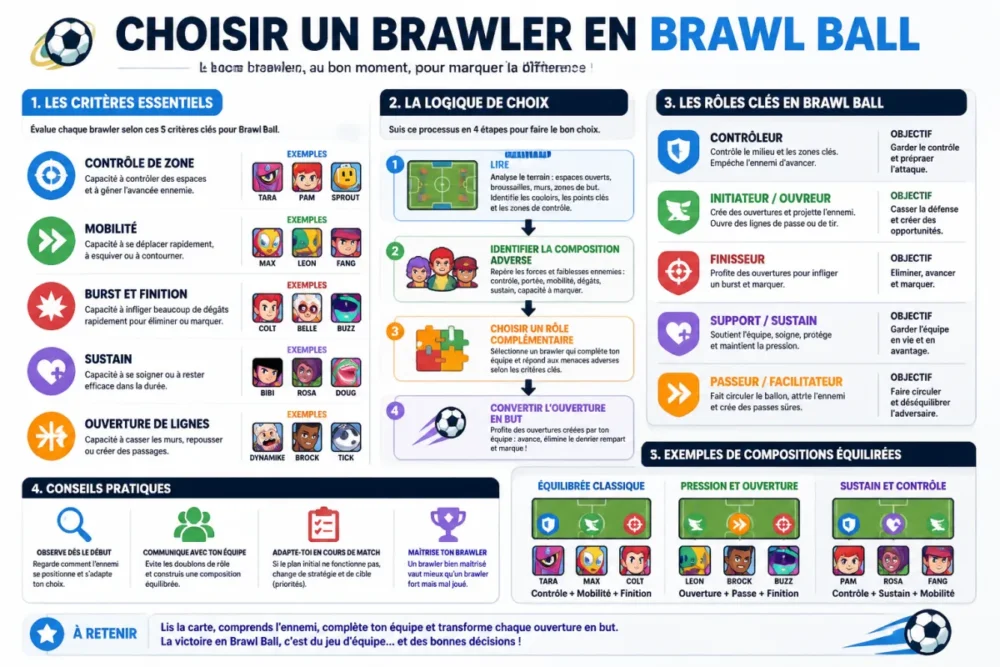
A brawler controls well when they prevent the opponent from taking a natural angle. This can be through a dangerous zone, ranged pressure, a slowing effect, or simply a presence that deters entry. This type of pick adds value to teammates because it reduces enemy options. In other words, it makes opponent decisions more predictable.
- Constant control and pressure: useful for holding the middle and preventing clean exits.
- Mobility and tempo recovery: decisive for punishing poor positioning or returning to defend.
- Burst and finishing: essential to convert a breach before the defense resets.
- Sustain and durability: valuable when the match settles into a tug of war.
- Opening lanes: important against defensive comps or walls close to the goal.
The effective range deserves some nuance. A long range is not automatically superior if the map blocks the lines of fire or if the ball carrier has to advance through a narrow corridor. Conversely, a medium range becomes formidable when it precisely covers the areas where opponents must pass. That is why Brawl Ball maps change the hierarchy so much.
This logic also explains why some explosive picks are very attractive at first, then disappointing. Mortis, Edgar, or Fang can turn around a play, but require a fine reading of cooldowns, distances, and positioning. If they enter too early, they offer a reset. If they enter at the right moment, they create a scoring sequence in a few seconds. Cherry on top: in a well-built composition, their mere threat sometimes forces the opponent to play lower.
The best brawler profiles by role
Rather than reciting a fixed top list, it is better to think by roles. It is more stable, more useful, and frankly less misleading after a patch. The best Brawl Ball brawlers often have a very clear specialty, but they become excellent when this specialty complements the other two team members.
Controllers who lock down the field
Controllers are the silent architects of a good composition. They do not always appear as the heroes of the action, but they prevent the opponent from breathing. Emz, Rico, or certain profiles capable of holding angles can make life hell for a team trying to exit through the sides. Their role: to install lasting pressure, nibble away space, and prepare the decisive action.
A controller becomes particularly strong when the map imposes mandatory passages. On a map where the middle is contested around corridors or walls, they can turn every opponent reset into a risk. In this case, their impact is measured not only by eliminations but by the number of times they force the enemy to retreat, throw the ball, or use a defensive resource too early.
Explosive brawlers who punish mistakes
Explosive brawlers live off short windows. They wait for a missed shot, an over-advanced move, a wasted gadget, then they enter. Their value depends as much on the player as on the map. Mortis, Fang, Edgar, or Buzz can be terrible if the team around them creates enough chaos to offer them a clean entry.
The trap is to confuse explosiveness with the obligation to attack constantly. A finisher who waits three seconds longer can sometimes win the game. In Brawl Ball, the perfect opening is not necessarily spectacular: a low-health opponent, a broken wall, a pushed-back defender, and the ball already placed are enough to create a winning play.
Tanks and line breakers
Tanks shine when they can impose their body on the map. Bull, Bibi, or Jacky can absorb pressure, advance despite shots, and create defensive panic. Jacky, in particular, well illustrates the interest of a profile that combines defense, quick entry, and close-range threat, especially with a temporary acceleration highlighted in Google Play recommendations.
But a tank quickly becomes readable if they always advance along the same line. Facing control brawlers or a well-spaced defense, they can be slowed down, zoned, then eliminated before even touching the ball. In other words, the tank is excellent when breaking the opponent’s plan; they are average when they themselves become the most predictable plan of the game.
Supports who accelerate a winning comp
Supports are often underestimated because their impact is less flashy. Yet, a support capable of healing, stabilizing an area, or accompanying a push turns a good play into an unstoppable one. Doug fits this logic: his durability, ability to heal allies, and deal damage at the same time give him real value in prolonged pressure phases.
How to adapt your picks to the map and the opposing composition?
To adapt your pick in Brawl Ball, you need to read three things: the openness of the map, the density of walls near the goal, and the opponent’s ability to defend low. Open map: prioritize range and mobility. Closed map: favor tanks, short control, and burst. Compact defense: look for line breakers.
The map is the number one filter. A brawler excellent on a closed map can lose a lot of value if the lines are open and opponents punish them before they enter. Conversely, a shooter or controller who dominates a wide map can become frustrating to play if every duel happens at close range behind a wall.
On open maps
Open maps favor useful range, lateral mobility, and the ability to punish a poorly protected carrier. Here, picks that are too slow suffer, unless they have solid support or a reliable way to advance. A controller with good range can maintain pressure while the finisher waits for the moment when the defense stretches out.
On closed maps
Closed maps value short fights, explosive entries, and brawlers capable of holding near walls. Tanks and certain controllers become much more threatening because distances shrink. But beware: if your comp lacks a way to open up the game, you risk always pushing down the same lane. And then, the opponent just has to wait.
Against a very defensive comp
Against a team that camps low, you need to create a break. This can come from a broken wall, a burst that forces an elimination, a support that extends pressure, or a mobile brawler attacking from an unexpected angle. The worst choice would be a too linear comp, unable to threaten other than by advancing straight ahead.
The page Brawlify dedicated to a Brawl Ball map actually illustrates this logic: the best picks are often read map by map, with win rates, pick rates, and compositions varying according to the environment. That is exactly why a general list should remain a starting point, not an automatic instruction.
Which Brawl Ball synergies can turn a match?
A good Brawl Ball synergy is based on a simple idea: one player opens, another converts, the third secures. If all three do the same thing, the comp becomes readable. If no one can finish, the team controls without scoring. If no one can hold the middle, the finisher spends the match defending. In short, a complete mechanic is needed.
The best composition is not the one that adds up three good brawlers, but the one that creates an action the opponent does not have time to resolve.
A creator-finisher duo can be enough to turn a round. The creator forces a retreat, breaks a line, or draws two opponents. The finisher keeps resources for the moment when the ball becomes playable. The third player prevents the action from turning into a counterattack. This role seems thankless, but it often makes the difference between a failed breakthrough and a real goal.
- Controller + mobile finisher: ideal to force a mistake then punish immediately.
- Tank + support: strong for pushing slowly but surely toward the goal.
- Wall breaker + shooter: useful against low defenses and locked maps.
- Mobile passer + burst: dangerous when the team knows how to play fast after recovery.
The role of the passer is often misunderstood. Carrying the ball is not always an advantage: it blocks the brawler’s attack and can make them vulnerable. A good passer sometimes knows when to drop the ball in a safe zone, take a duel, then recover it. The cherry on top: a well-placed lateral pass forces the defense to change angle, which sometimes opens up more than just a brute elimination.
Common mistakes that cause losses in Brawl Ball
The first mistake is to play a strong pick without considering the map. This is a classic. You see a high-ranked brawler in a Brawl Ball tier list, you select them, then discover too late that the map offers neither angle, entry, nor protection. A meta pick poorly used remains a bad choice in the actual game.
The second mistake is seeking duels instead of seeking progression. Brawl Ball is not a deathmatch. Eliminating two opponents doesn’t help much if the ball stays far away, if no one pushes, or if your team repositions poorly behind. Conversely, pressure without elimination can be excellent if it forces the opponent to abandon the center.
- Ignoring the map: choosing a dominant brawler, but without an exploitable playline.
- Overplaying aggression: entering before allies are ready to follow.
- Forgetting defense after a goal: allowing a quick equalizer on the restart.
- Composing too slowly: lacking mobility to recover lost balls.
- Stacking the same roles: having three finishers but no real control of the field.
It is always appreciated to have a player capable of making highlights, but consistency often comes from less visible decisions: saving a resource to defend, not shooting the ball into a useless wall, waiting for the opponent to use their gadget, or stepping back two squares to prevent a breakthrough. These small choices don’t shine in clips, but they win games in Brawl Ball.
Key Takeaways
- ⚽ The best picks gain ground before seeking the goal.
- 📊 Damian, Trunk, and Gigi statistically dominate according to Brawl Time Ninja data.
- 🧠 The map matters as much as the tier list when choosing a reliable brawler.
- 🛡️ A good comp mixes control, mobility, finishing, and defensive restart.
- 🔥 Damage alone is not enough if the action doesn’t lead to a goal.
FAQ
What is the best Brawl Ball brawler to progress quickly?
The best choice depends on your style, but favor a readable brawler, useful even without spectacular action, and capable of defending. A profile with control or durability often helps progress more than a very technical assassin who requires perfect timing.
Should you always follow the Brawl Ball tier list?
No, the tier list serves as a guide, not an autopilot. Data like that from Brawl Time Ninja is very useful, especially with over 16 million battles analyzed, but it must be cross-referenced with the map, your skill level, and your team composition.
Which brawlers should be avoided in Brawl Ball?
Avoid especially brawlers that don’t fit the map or that overlap too much with your allies. A very strong pick can become bad if your team lacks mobility, control, or means to break a compact defense.
How to counter a team with many tanks?
You must avoid giving them short and predictable fights. Favor control, slows, cross angles, and brawlers capable of punishing a too-direct entry before the tank reaches the ball.
Can a support really carry a game in Brawl Ball?
Yes, but rarely spectacularly. A support carries a game by extending pushes, securing restarts, and allowing the finisher to remain threatening longer. In a coordinated comp, this value becomes huge.